
Film cameras have seen a resurgence in popularity, offering a tactile, creative experience. With models like Pentax and Reflex reviving SLR designs, they blend nostalgia with modern functionality, appealing to photographers seeking unique results and connectivity to the analog process.
What is a Film Camera?
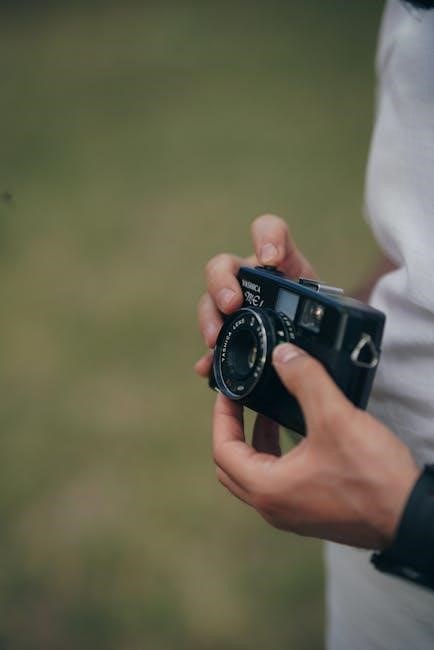
A film camera is a device that captures images using light-sensitive photographic film. Unlike digital cameras, it records images on physical film rolls, which must be developed to reveal the photos. Film cameras come in various types, including SLR (Single Lens Reflex), point-and-shoot, and rangefinder models. They operate by exposing film to light through a lens and shutter system, with manual controls for aperture, shutter speed, and ISO. The process of using film cameras is tactile and deliberate, offering a unique creative experience. Many photographers appreciate the challenge and satisfaction of working with film, as it requires careful consideration of each shot. Film cameras remain popular for their distinct aesthetic and nostalgic appeal.
Advantages of Film Cameras
Film cameras offer a unique, tactile photography experience. They encourage deliberate shooting, as each frame must be carefully considered. The aesthetic of film, with its distinct grain and tonal range, is often prized for its authenticity and charm. Film cameras also promote creativity through manual controls, allowing photographers to learn and master fundamental techniques. Additionally, film cameras are durable, with many lasting decades with proper care. The process of shooting and developing film fosters patience and appreciation for the craft. For enthusiasts, film cameras provide a refreshing alternative to digital, offering a connection to the roots of photography and a satisfying, hands-on process.
Disadvantages of Film Cameras
Film cameras require manual adjustments, which can be time-consuming and less convenient than digital alternatives. Each shot uses physical film, increasing costs over time. The need to develop film delays seeing results, and mistakes or poor settings may only be discovered later. Limited shots per roll mean frequent reloading, interrupting workflows. Additionally, film cameras are often heavier and bulkier, making them less portable. Repairing older models can be challenging and costly due to limited parts availability. Lastly, the lack of instant review forces photographers to rely on their skills and judgment without immediate feedback, adding pressure to capture perfect shots.

Understanding Your Film Camera Components
Film cameras consist of key parts like the lens, viewfinder, shutter, and film chamber. These components work together to capture images, ensuring proper exposure and focus for optimal results.
Exterior Components
The exterior of a film camera includes essential features that facilitate operation and control. The lens is the primary component, responsible for focusing light. The viewfinder allows framing shots accurately. The film advance lever moves the film to the next frame, while the rewind knob is used to rewind exposed film. Shutter and aperture controls adjust exposure settings. A tripod mount provides stability, and flash units can be attached for additional lighting. These components work together to ensure precise control over image capture, making the exterior design integral to the camera’s functionality and user experience.
Interior Components
The interior of a film camera houses critical mechanisms that ensure proper film handling and exposure. The film chamber securely holds the loaded film cartridge. A light-tight compartment prevents exposure to unwanted light. The shutter mechanism controls the duration of exposure. The mirror and prism system in SLR cameras reflects light to the viewfinder. A light meter measures ambient light for accurate exposure settings. The film transport system advances and rewinds the film smoothly. These internal components work seamlessly to capture high-quality images, maintaining the camera’s reliability and performance.
Key Functions
Key functions of a film camera include film advancement, shutter operation, aperture control, and light metering. The film advance mechanism moves the film to the next frame, ensuring each exposure is captured on fresh emulsion. The shutter controls the length of exposure, with speeds ranging from slow to fast. Aperture adjustment regulates light entry, affecting depth of field. Light meters provide readings to guide exposure settings, ensuring balanced images. Additionally, features like flash synchronization and multiple exposure capabilities enhance creative control. These functions work together to produce well-exposed, high-quality photographs, making the camera a versatile tool for artistic expression and technical precision in film photography.

Loading Film in Your Camera
Open the camera back, insert the film cartridge, and lock it in place. Advance the film using the winding lever until it stops, ensuring proper alignment and tension. Always check the exposure counter to confirm the film is loaded correctly before shooting.
Preparing the Camera
Before loading film, ensure your camera is ready. Check the battery to confirm it’s fresh or fully charged. Open the camera back by lifting the film rewind knob sharply. Locate the film chamber and prepare the film cartridge. Ensure no old film remains and the camera is set to its initial state. Gently insert the film cartridge into the chamber, securing it firmly. Close the camera back and advance the film using the winding lever until it stops, ensuring proper tension. Verify the exposure counter resets to zero, indicating the film is loaded correctly. This preparation ensures smooth operation and prevents errors during shooting.
Inserting Film
To insert film, open the camera back by lifting the rewind knob. Align the film cartridge with the chamber and gently place it inside; Secure the cartridge to ensure it’s firmly seated. Close the camera back and advance the film by turning the winding lever until it stops, signaling proper loading. This step ensures the film is correctly positioned for shooting. Always handle the film by the edges and avoid touching the sensitive emulsion side to prevent damage. Ensure the film is seated and tensioned correctly before closing the camera to maintain functionality and image quality.
Advancing Film
After inserting the film, advance it to the first frame by turning the winding lever until it stops. This ensures the film is properly seated and ready for exposure. The exposure counter will automatically reset, indicating the first frame. For subsequent shots, advance the film by turning the lever until it stops, ensuring the next frame is positioned correctly. Avoid over-advancing, as this can damage the film or camera mechanism. Always check the counter to confirm the frame number matches your progress. Proper advancement ensures each shot is captured accurately and maintains the integrity of the film roll. This step is crucial for consistent results.
Mastering the Basics of Shooting with Film
Set the correct ISO for lighting conditions, understand aperture for depth of field, and master shutter speed for motion control. These fundamentals ensure precise, creative results in film photography.
Setting the Correct ISO
ISO sensitivity is crucial in film photography, determining how sensitive the film is to light. Lower ISOs (e.g., 100-200) are ideal for bright conditions, producing sharp images with fine grain. Higher ISOs (e.g., 400-1600) are better suited for low-light situations but may result in noticeable grain. Always match the film’s ISO to the lighting environment for optimal results. Adjusting ISO incorrectly can lead to underexposed or overexposed photos. Refer to your camera’s manual for specific guidance on setting the ISO for different scenarios, ensuring your shots capture the desired aesthetic and quality.
Understanding Aperture
Aperture is a critical component in film photography, controlling the amount of light entering the lens. Measured in f-stops (e.g., f/2.8, f/4), a lower f-stop value means a larger aperture, allowing more light and creating a shallower depth of field. Conversely, a higher f-stop value results in a smaller aperture, less light, and a deeper focus. Aperture settings are essential for achieving the desired aesthetic, such as blurring backgrounds or keeping landscapes sharp. Always refer to your camera’s manual for specific aperture ranges and guidance on selecting the right f-stop for your scene.
Mastering Shutter Speed
Shutter speed determines how long the camera’s shutter remains open, measured in seconds or fractions of a second. Faster speeds (e.g., 1/1000th of a second) freeze motion, ideal for sports or wildlife, while slower speeds (e.g., 1 second) create blur, adding artistic effects to water or clouds. Aperture and ISO work together with shutter speed to achieve proper exposure. Experimenting with different speeds allows photographers to capture dynamic or creative shots. For sharp images, faster speeds are preferred, but slower speeds can add motion and depth. Always consider lighting conditions and desired effects when setting shutter speed, using your camera’s manual as a guide.

Exposure Control in Film Photography
Exposure control balances aperture, ISO, and shutter speed to capture optimal light. Use light meters for accuracy and adjust settings manually for precise, creative results in film photography.
Using the Light Meter
A light meter is essential for achieving accurate exposure in film photography. It measures ambient light to determine the ideal aperture, ISO, and shutter speed combination. Most film cameras feature built-in light meters, while external meters offer precise readings. To use a light meter, frame your subject, ensure the meter is not obstructed, and take a reading. Adjust settings like aperture or shutter speed based on the meter’s recommendation. Some cameras allow for spot or center-weighted metering, providing flexibility. Always calibrate your meter for accuracy and remember to compensate for creative choices, such as overexposing or underexposing for artistic effects.
Manual Exposure
Manual exposure allows photographers to take full creative control over their shots by adjusting aperture, ISO, and shutter speed independently. This mode is ideal for challenging lighting conditions or artistic effects. Using the light meter as a guide, photographers can set precise values to achieve desired results. For example, lowering the shutter speed can create motion blur, while a small aperture can ensure deep focus. Bracketing shots—capturing multiple exposures of the same scene—is a useful technique to ensure optimal results. Modern film cameras often include manual modes, offering flexibility for experienced photographers. Mastering manual exposure enhances creativity and precision in film photography, making it a valuable skill for any photographer.
Bracketing Shots
Bracketing shots is a technique where multiple exposures of the same scene are captured at different settings to ensure optimal results, especially in challenging lighting. Typically, photographers take three shots: one at the metered exposure, one underexposed, and one overexposed. This approach helps capture detail in both highlights and shadows. Using a light meter can guide exposure adjustments, but manual cameras require adjusting aperture or shutter speed. Keeping ISO consistent is often preferable, allowing focus on aperture and shutter changes. While some cameras offer automatic bracketing, older models require manual adjustments. Practice is essential to master this technique, particularly in high-contrast scenes, to achieve well-balanced exposures in film photography.

Aperture and Depth of Field
Aperture controls the depth of field, with smaller f-stops (e.g., f/16) increasing sharpness across the image, while larger apertures (e.g., f/2.8) blur backgrounds creatively.
Aperture refers to the camera’s iris, controlling light entry through adjustable blades. Measured in f-stops (e.g., f/2.8 or f/16), a lower f-stop means a larger aperture, letting in more light and creating a shallower depth of field. Conversely, a higher f-stop results in a smaller aperture, reducing light intake and increasing sharpness across the image. This fundamental setting directly impacts the aesthetic of your photos, allowing creative control over focus and background blur. Properly adjusting aperture is essential for achieving desired visual effects in film photography, making it a crucial skill for mastering your camera’s capabilities. Experimenting with aperture settings helps photographers understand its influence on their work.
Depth of Field Techniques
Depth of field refers to the portion of an image that appears sharp, from foreground to background. A shallow depth of field isolates subjects, while a deep depth of field keeps more of the image in focus. Aperture settings control this effect, with wide apertures (low f-stops) creating shallow depth and narrow apertures (high f-stops) producing deep depth. Techniques like using a small aperture for landscapes or a large aperture for portraits allow photographers to guide the viewer’s attention. Properly adjusting depth of field enhances storytelling in photos, making it a powerful tool for creative expression and visual impact in film photography.

ISO and Film Speed
Film speed, measured in ISO, determines sensitivity to light. Lower ISOs (e.g., 100, 200) suit bright conditions, minimizing grain, while higher ISOs (400, 800) are ideal for low-light situations, though they may increase grain, affecting image clarity.
ISO Basics
ISO, or International Organization for Standardization, refers to a film’s sensitivity to light. Lower ISO values (e.g., 100, 200) are ideal for bright lighting conditions, producing sharp images with minimal grain. Higher ISOs (e.g., 400, 800) are better suited for low-light environments, allowing the camera to capture images without excessive blur from slower shutter speeds. However, higher ISOs can introduce noticeable grain, which may affect image quality. Understanding ISO is crucial for achieving optimal results in various shooting scenarios, ensuring well-exposed photographs with desired aesthetic qualities. Proper ISO selection balances light sensitivity and image clarity, enhancing the overall photographic experience.
Choosing the Right Film Speed
Selecting the appropriate film speed is essential for achieving desired results in photography. Film speed, measured by ISO, determines sensitivity to light. Lower ISOs (e.g., 100-200) are ideal for bright lighting, producing sharp, fine-grained images. Higher ISOs (e.g., 400-800) are better suited for low-light conditions but may introduce noticeable grain. Consider the lighting environment and the effect you want to achieve. For portraits or landscapes in sunlight, ISO 100-200 is recommended. For indoor or low-light scenarios, ISO 400-800 is more practical. Experiment with different speeds to balance image quality and aesthetic preferences, ensuring optimal outcomes for various shooting situations and creative goals.
Composition Tips for Film Photography
Composition is key to capturing compelling images. Use the rule of thirds, leading lines, and symmetry to frame subjects. Natural lighting enhances depth and mood, while simplifying backgrounds emphasizes focus. Experiment with angles and patience to create unique, timeless shots.
Rule of Thirds
The rule of thirds is a fundamental composition technique in film photography. It involves dividing the frame into a 3×3 grid, with key elements placed along the lines or at their intersections. This creates balance and visual interest. Instead of centering your subject, position them off-center to add depth and dynamic energy to your shots. Apply this principle to landscapes by placing horizons along the top or bottom third, avoiding the center. Experiment with this technique to elevate your storytelling and create more engaging, professional-looking images that draw the viewer’s eye naturally through the scene.
Leading Lines
Leading lines are a powerful composition tool in film photography, guiding the viewer’s eye to the subject. Look for natural or man-made features like roads, shorelines, fences, or paths that lead into the frame. Align these lines to converge at your subject, creating depth and direction. Experiment with angles—low or high—to add dynamism. Ensure the lines are sharp and well-defined, using a smaller aperture if needed. This technique enhances storytelling, drawing attention to the main element and creating a sense of movement or stability. Practice identifying and framing scenes with strong leading lines to add visual impact and professionalism to your film photography.

Using Flash and External Lighting
Flash enhances low-light photography, with built-in options for convenience and external units for more control. Avoid covering sensors and adjust settings for optimal illumination in various environments.
Built-in Flash
A built-in flash provides convenient illumination in low-light conditions, automatically activating when needed. Ensure no fingers or straps block the flash sensor for accurate exposure. Use the flash for indoor shots or to fill shadows outdoors. Check your camera’s manual to understand flash synchronization with aperture settings. Avoid covering the flash sensor with your hand or strap for proper operation. Some cameras allow adjusting flash intensity manually for balanced lighting. Always clean the flash surface to maintain efficiency. For more control, consider external flash units, but the built-in option offers simplicity and portability for everyday use. Refer to your camera’s manual for specific flash settings and guidelines.
External Flash
An external flash offers greater versatility and power compared to built-in flashes. It connects via a hot shoe or PC sync port, allowing precise control over lighting. External flashes are ideal for complex setups, enabling bounce lighting and adjustable angles. They often feature manual controls for intensity and zoom, enhancing creativity. Compatibility varies, so ensure your flash matches your camera model. Models like the Olympus C-2100 Ultra Zoom support external flashes, offering advanced lighting options. Always test the flash before shooting to ensure proper synchronization and exposure. This ensures optimal results in various lighting conditions, making external flashes invaluable for professional and artistic photography.
Troubleshooting Common Issues
Film cameras may face issues like jammed film or shutter malfunctions. Regular cleaning and proper storage can prevent many problems. Always refer to the manual for specific solutions.
Jammed Film
Film jams can occur due to improper loading, rough handling, or obstructions. To resolve, stop immediately and rewind the film carefully to avoid tearing. If stuck, open the camera back, gently release the tension, and re-align the film. Avoid forcing the film, as it may damage internal mechanisms. Regular cleaning of rollers and guides can prevent jams. Always refer to your camera’s manual for specific instructions, as different models may have varying procedures. Proper film handling and storage are key to minimizing such issues.
Shutter Issues
Shutter issues, such as slow or stuck curtains, can cause exposure problems. These often result from dirt, oil, or mechanical wear. Clean the shutter blades gently with a soft brush or contact a professional. If the shutter speed LCD shows unusual readings, like ‘1000,’ ensure the exposure counter is reset properly. For persistent issues, refer to the manual or consult a repair service. Regular maintenance, like cleaning and proper storage, can prevent shutter malfunctions. Always handle the camera with care to avoid damage to this critical component.

Caring for Your Film Camera
Regular maintenance ensures longevity. Clean the lens with a soft cloth, avoid harsh chemicals, and store in a cool, dry place. Use a dry cloth to wipe exterior parts and ensure batteries are inserted correctly to prevent corrosion. Proper care extends your camera’s lifespan and maintains its performance.
Cleaning the Lens
Cleaning the lens is essential for maintaining image quality. Use a soft, dry microfiber cloth to gently wipe away smudges and fingerprints. Avoid harsh chemicals or abrasive materials that could scratch the glass. For stubborn spots, lightly dampen the cloth with distilled water, but ensure it’s completely dry before wiping the lens. Never touch the lens surface with your fingers, as oils can leave residue. Regular cleaning prevents dust and grime from affecting your photos. Store the lens cap when not in use to protect it from debris. A clean lens ensures sharp, clear images and prolongs the camera’s performance.
Storing the Camera
Proper storage is crucial for maintaining your film camera’s condition. Keep it in a cool, dry place away from direct sunlight and moisture. Avoid basements or attics with extreme temperatures. Use a protective case or camera bag to shield it from dust and physical damage. Remove batteries when storing for extended periods to prevent corrosion. Store film separately in a sealed container to preserve its quality. Avoid stacking heavy objects on top of the camera. Regularly inspect the camera for signs of wear or damage. Proper storage ensures your camera remains functional and ready for use, preserving its longevity and performance over time.

The History and Evolution of Film Cameras
Film cameras evolved from early photographic processes to modern designs. The Zenit-11 and Reflex exemplify this journey, blending nostalgia with contemporary technology, preserving the art of analog photography.
Early Film Cameras
Early film cameras, like the Zenit-11, laid the groundwork for modern photography. Introduced in the mid-20th century, these devices were designed for amateur photographers, offering simplicity and versatility. The Zenit-11, for instance, supported various shooting styles, including black-and-white film, making it accessible to a wide audience. These cameras often featured manual controls, teaching photographers the fundamentals of exposure and composition. Their durability and reliability allowed them to withstand the test of time, becoming iconic tools in the evolution of film photography. Early models like the Kodak Pocket Instamatic and Bauer A512 Super 8 Movie Camera also played significant roles, simplifying the process for everyday use.
Modern Developments
Modern film cameras have evolved while preserving the essence of analog photography. The Reflex, a modular 35mm SLR, exemplifies this blend of tradition and innovation. Launched on Kickstarter, it combines manual film advance with contemporary design, appealing to both enthusiasts and new photographers. Similarly, the Pentax family continues to innovate, offering compact models with advanced features. These developments ensure film photography remains relevant, catering to a growing community that values tactile creativity. By integrating modern materials and user-friendly interfaces, these cameras keep the art of film alive, connecting the past with the present.


Need help with your Conair IP22 thermometer? Find the official manual, troubleshooting tips, and answers to common questions right here! Get accurate readings fast.

Can’t figure out your Miele induction cooktop? Find easy-to-understand manuals & troubleshooting tips right here! Download your **Miele induction cooktop manual** now.